This page uses javascript to help render elements, if you have problems please enable javascript.
 
You are now inside the main content area


left col

Uploading Images & Other Documents

Visuals and supporting documents are often needed in order to add some vibrancy, to convey additional information, or provide documentation that can be downloaded by a user.  In this section you will learn how and where to upload images and documents. 

How you name your files will determin your URL. Files/images should be named using concise and meaningful language using lowercase letters, numbers, and dashes only. DO NOT name files with blank spaces, dots, or any special characters. It is recommended that you rename your files and images before uploading. Select Website Basics in our best practices for more.

right col
 
 
left col

Uploading Images

When you upload images, make sure you first navigate to the the _resources/images folder. 

Uploading Using the Upload Button

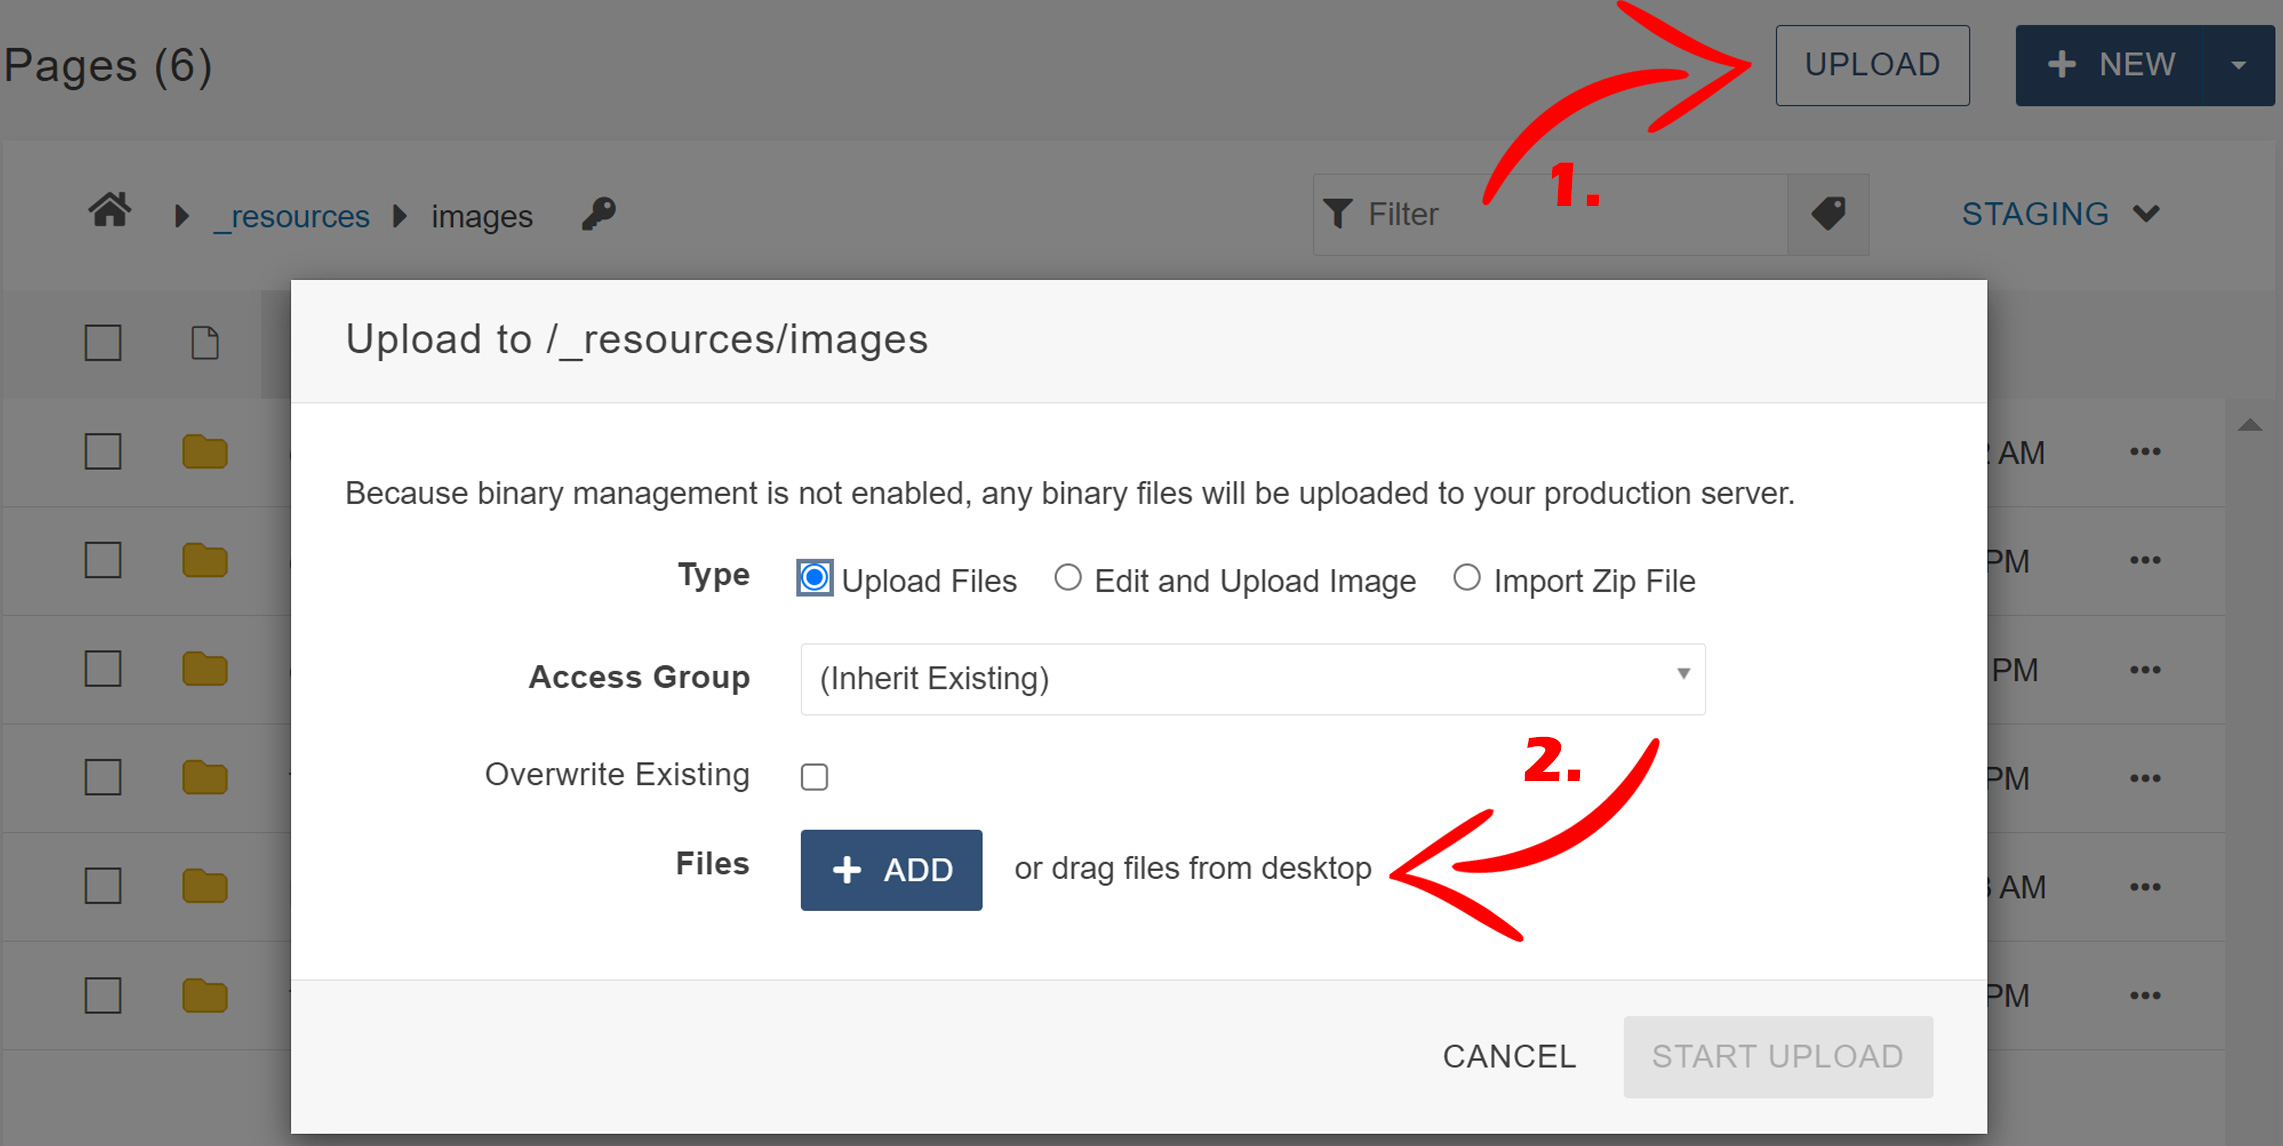
  1. Begin by clicking on the Upload button on the top right corner.
  2. This opens up the Upload dialogue box. Select the Add button to find your files on your device, or drag and drop items to this area.
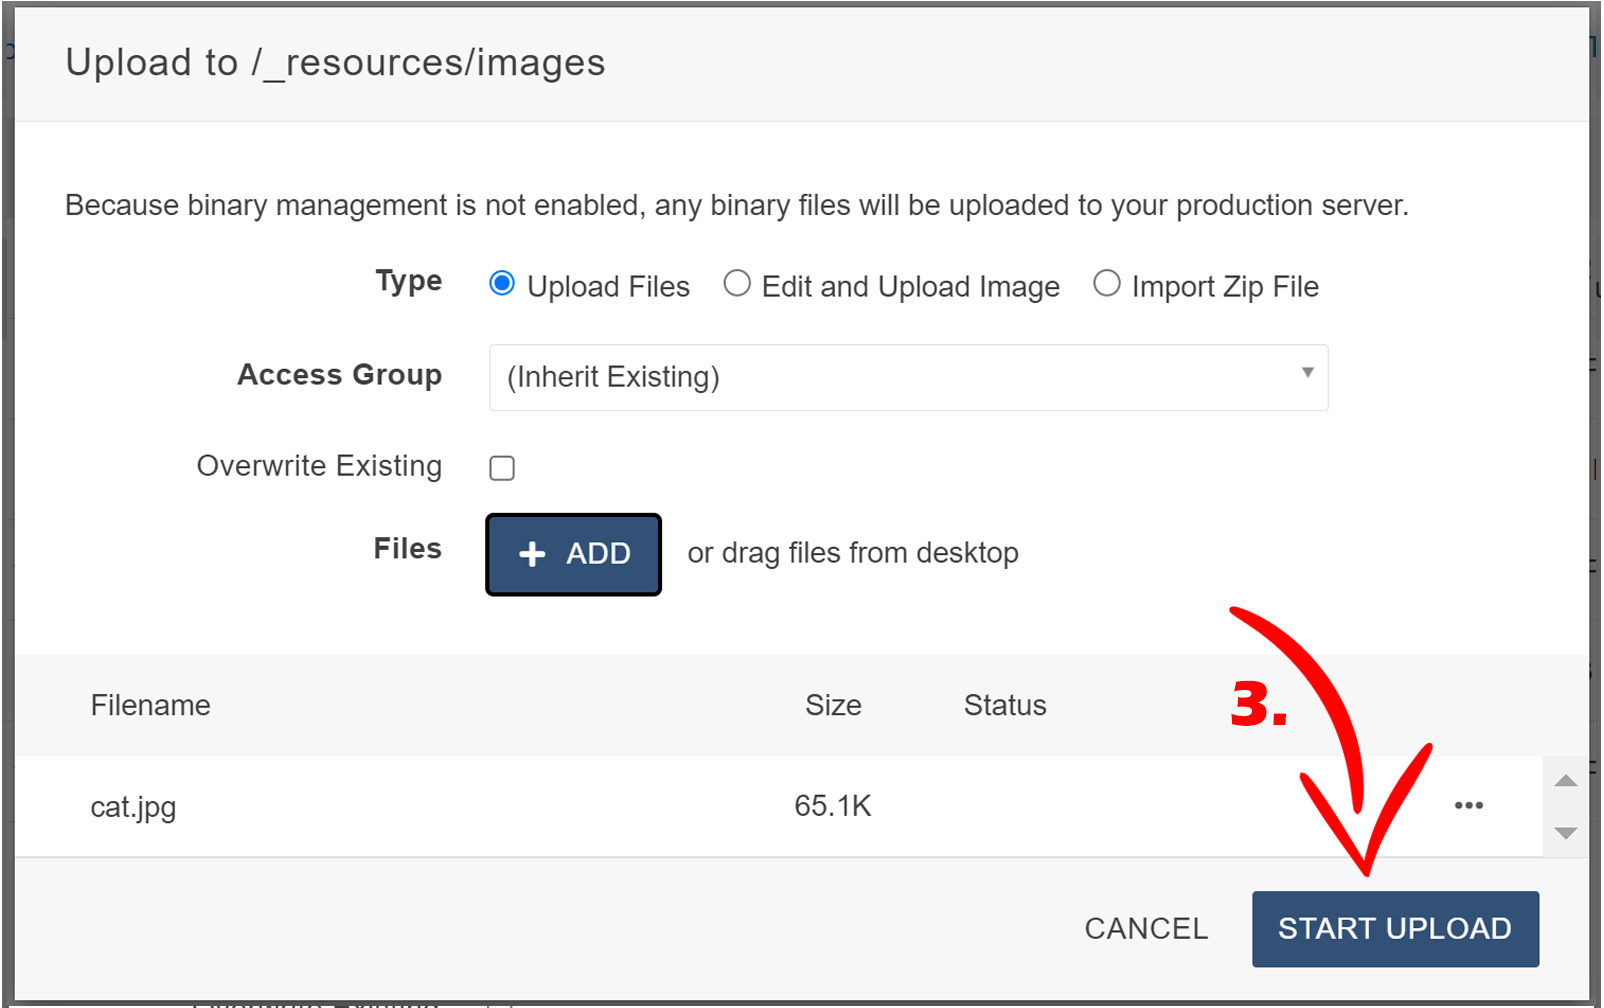
  3. After selection your images for upload, click on the Start Upload button.

NOTE: You can make folders inside the images folder prior to uploading images to further organize groups of photos.  This is helpful, for example, for making a staff page or displaying event photos when they are all stored together. 

Diagram 1 showing the Upload button and dialogue box

Diagram showing the start upload option after selecting images

right col
 
 
left col

Uploading in Edit Mode

You can also upload an image while in edit mode while using the Insert/Edit Image tool on the toolbar.

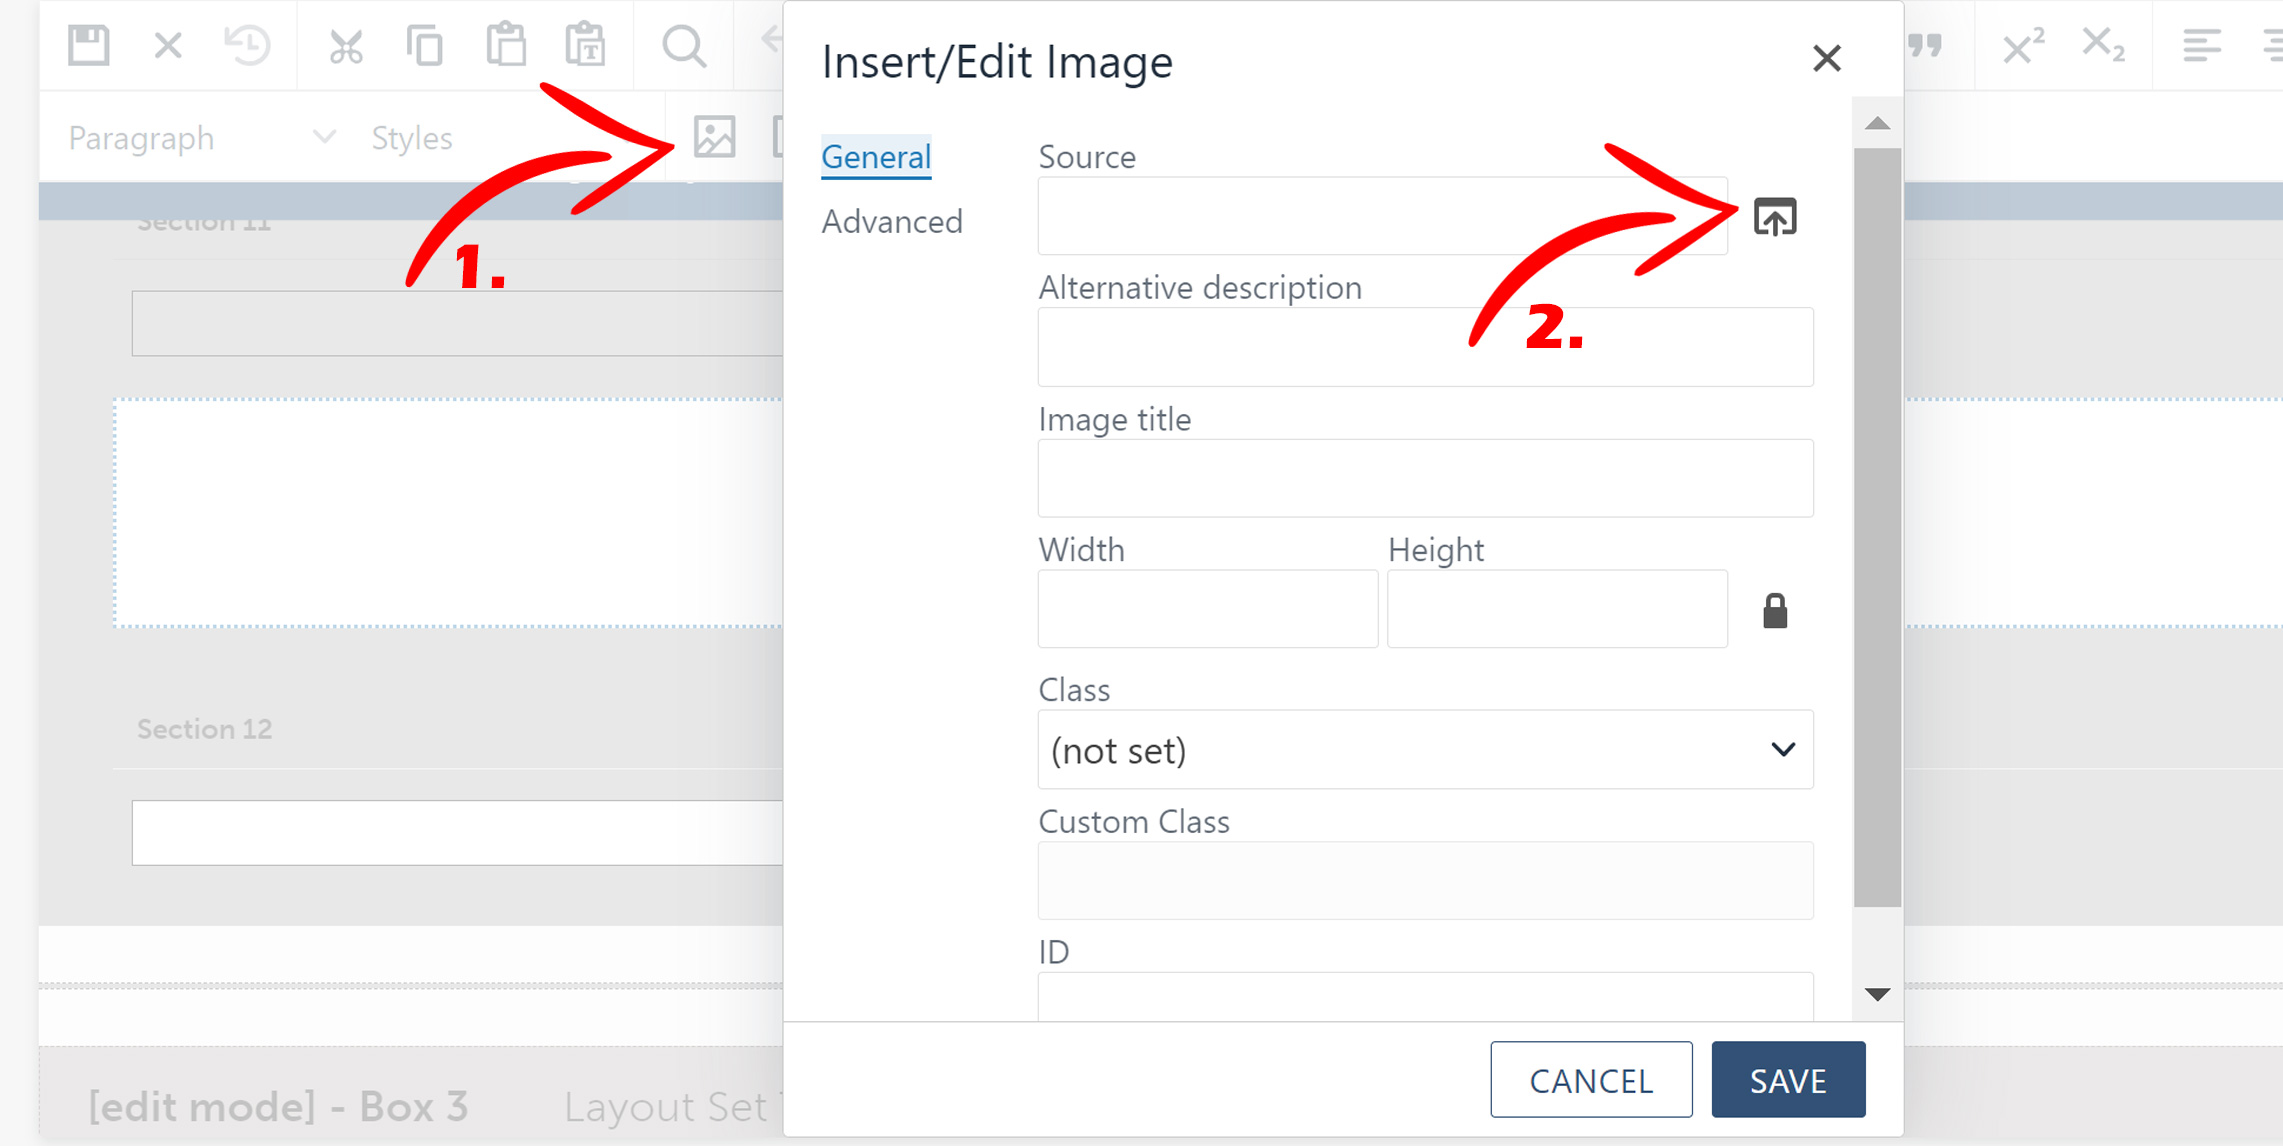
  1. In edit mode, select the Insert/Edit Image tool from the toolbar.
  2. Select the source button once the image dialogue box is open. This will open the _resources/images folder.
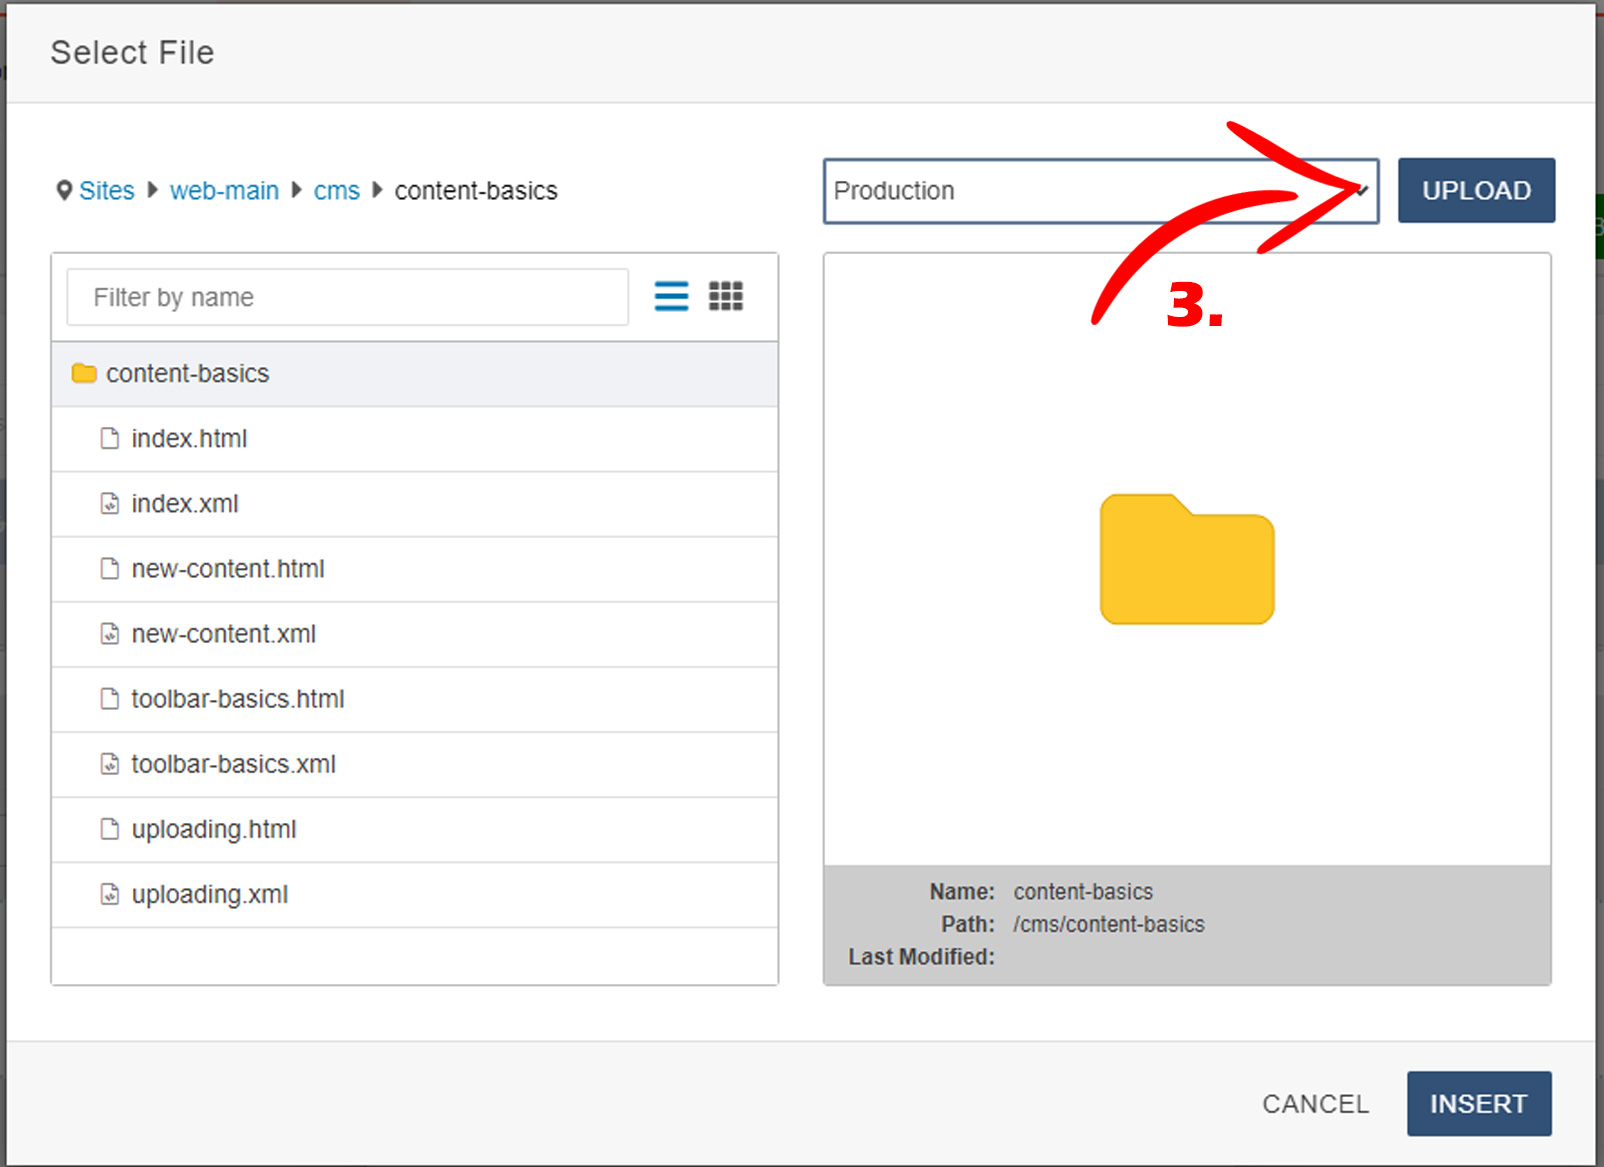
  3. From there, select the Upload button on the top right corner as seen in step 3 above.
  4. If you have uploaded a single image, it will automatically be selected for you to use and you can click Insert to add it to your content.

REMINDER: If you have created other folders within the images folder, make sure you navigate to the folder you want your new image to be added to.

Diagram showing how to upload an image in edit mode

right col
 
left col
right col
 
left col
right col
 
 
left col

Uploading Other Documents

The most common document type that gets uploaded to websites is the PDF format.  You can also upload Word documents (DOTX), Excel documents (XSL), or PowerPoint slides (PPT).

NOTE: All documents uploaded to any website MUST be made accessible prior to uploading.

Uploading Using the Upload Button

There is no set location for files to be uploaded to.  There is a folder pre-created found at _resources/pdfs that you may use.  You can also create a files or documents folder anywhere within your site that makes sense to you. 

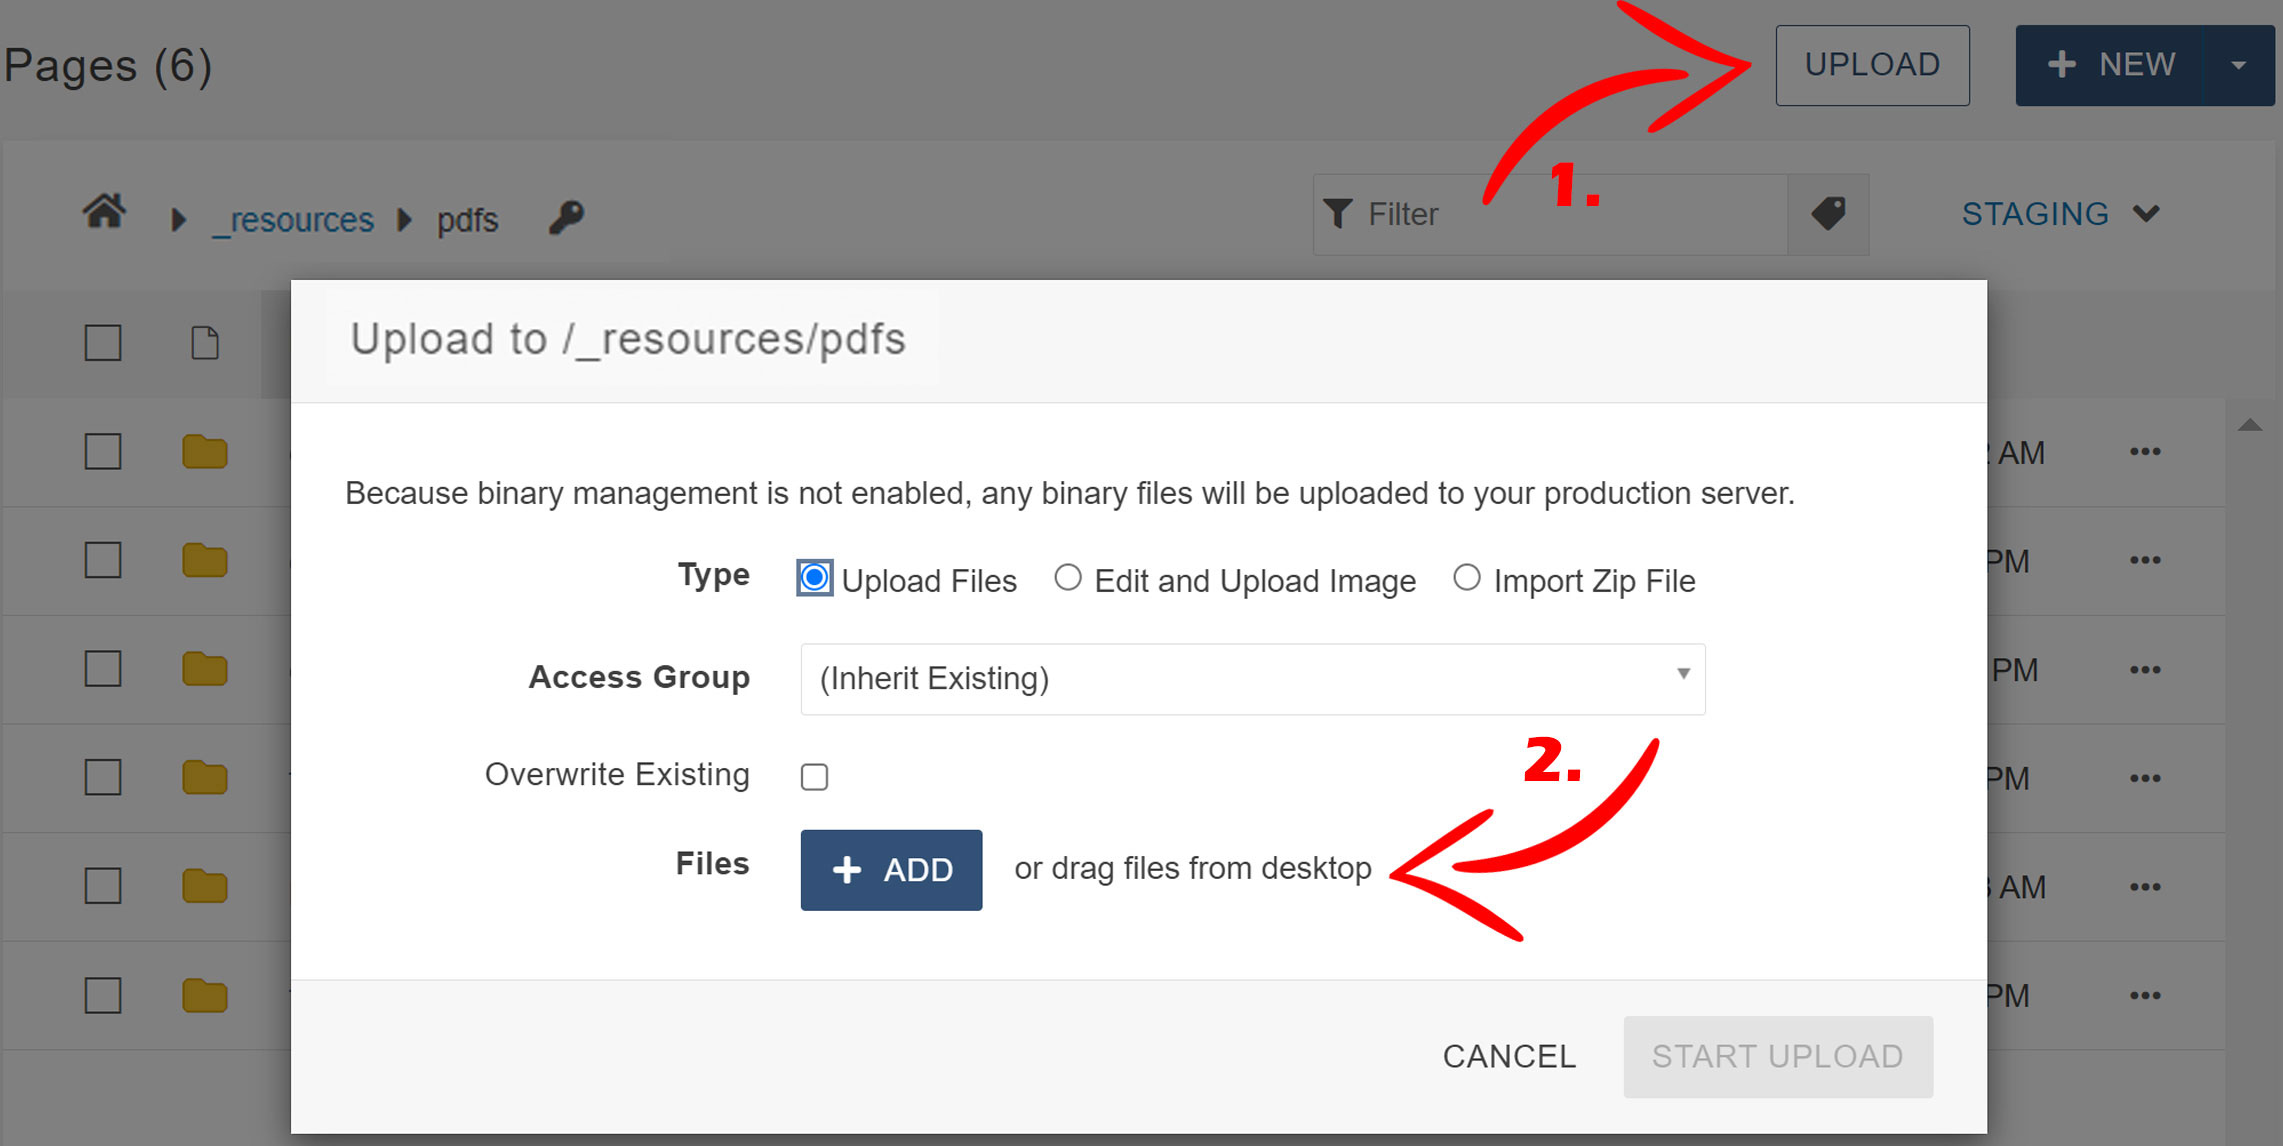
  1. Begin by clicking on the Upload button on the top right corner. Make sure you are in the folder where you want your document to be.
  2. This opens up the Upload dialogue box. Select the Add button to find your files on your device, or drag and drop items to this area.
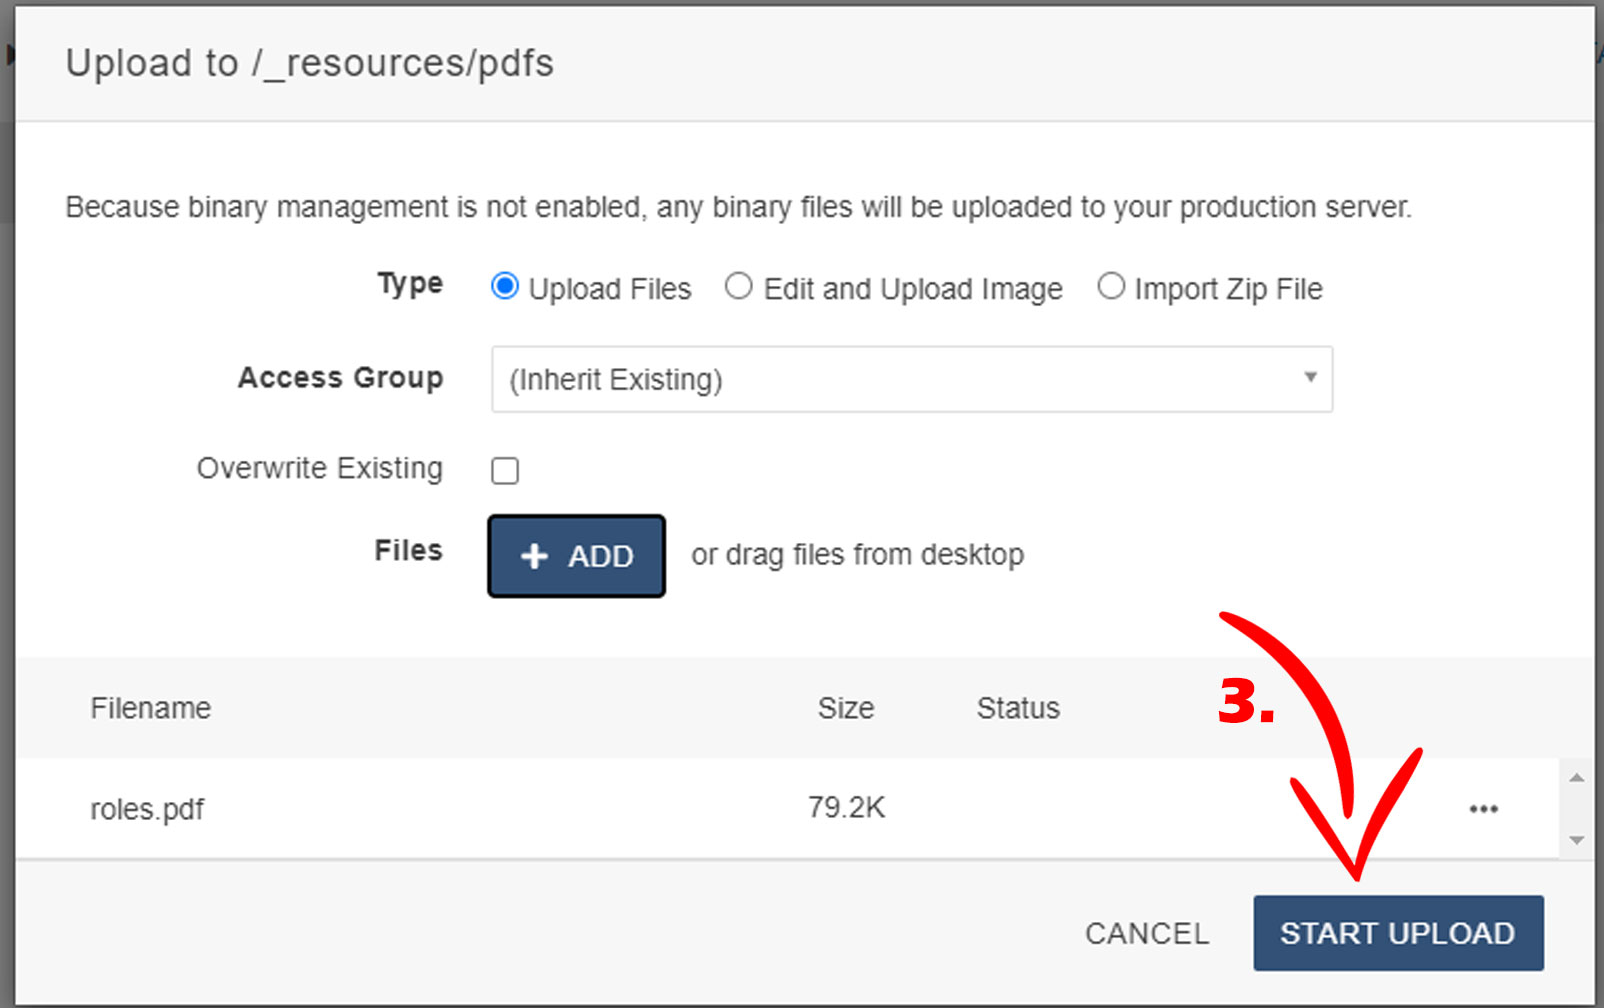
  3. After selecting your files for upload, click the Start Upload button.

Diagram showing where the upload button is

Diagram showing the start upoad button

right col
 
 
left col

Uploading in Edit Mode

You can also upload a document while in edit mode while using the Insert/Edit Link tool on the toolbar.

  1. Select the text you want to link to a document and then click the Insert/Edit Link button.
  2. Next, select the source button once the link dialogue box is open. This will open to the folder you are currently in.
  3. From there, select the Upload button on the top right corner and follow the same steps as above.
  4. Once you have uploaded a new document, select it and click Insert.

REMINDER: If you have created folders to store your documents, or want to use the folder that was precreated, make sure you navigate to the folder you want your new file to be added to prioer to clicking upload.

Diagram showing the link tool and source locations

diagram showing the upload button

right col
 
left col

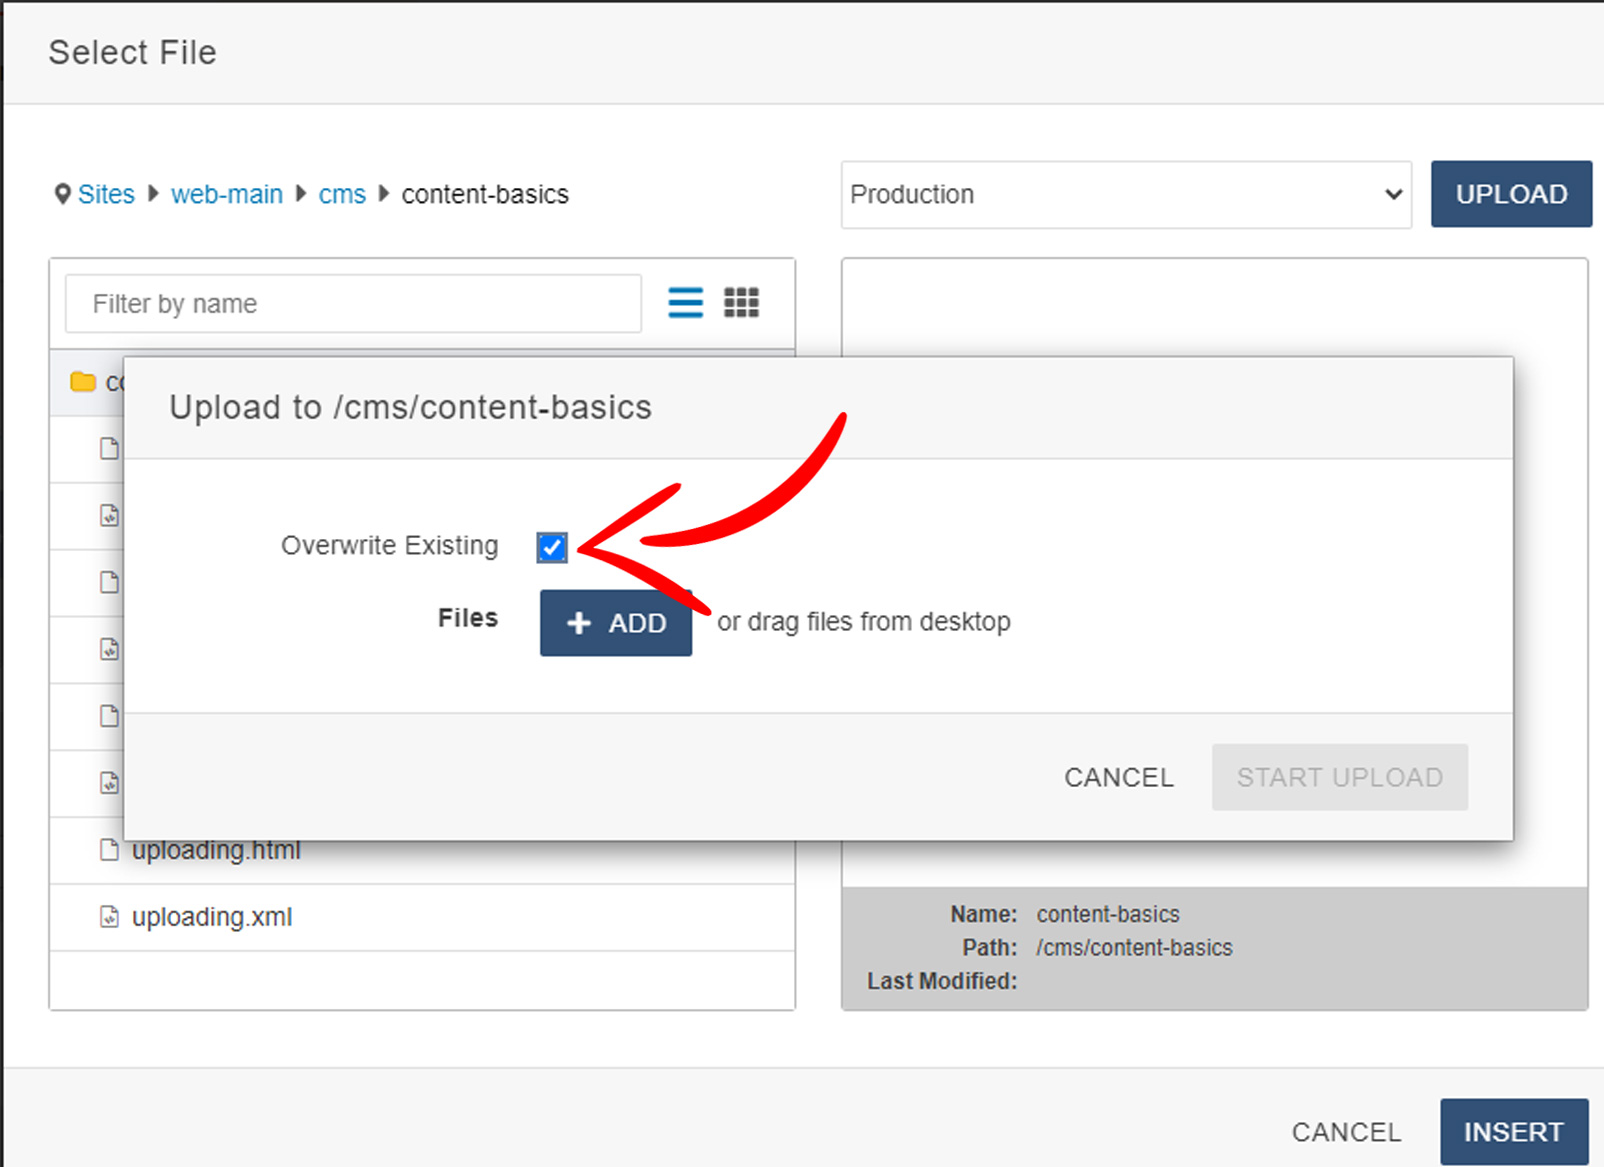
If you are uploading an image or document that will be replacing an existing file, it is recommended that you give your new file the same name as the old file and use the "Overwrite Existing" checkbox.  This keeps old copies of documents or images from staying in search engines and keeps your website clean and organized.

diagram showing where the overwrite existing checkbox is located

right col