This page uses javascript to help render elements, if you have problems please enable javascript.
 
You are now inside the main content area
 
left col

Info Blocks: Newsletters

Newsletters, messages in email

You will still need to have a 3rd party tool to help send emails and maintain a user list, but info blocks can help create the content that you want to send out.  It also can be put in your own website so anyone who missed the previous newsletters can always have a back up copy.

right col
 
left col

About Newsletters

Newsletters are email based news, updates, promotional information that users recieve by subcribing to a mail service which will send out periodic emails that keep users in the loop to whatever activity is happening.  The newsletter is typically send by a service provider and the benefit would be that users don't need to go to a website but rather brings that data to you via email.  

The great part is that users have very little to do other than check their email, the downside is that once the email has been sent the data can only be changed in a subsequent email.  There is no way to update email content after it has been sent.  

The V5 template does allow for past newsletters to be viewed at any time after it has been sent out; however, this will again not change the data that was sent in an email.  Newsletters can act like a blog from the concept of having stories and the ability to view them online.  If you don't want to run a 3rd party email service you can always use a blog and just put your energies into getting your blog promoted so people know where to find it.

right col
 
 
left col

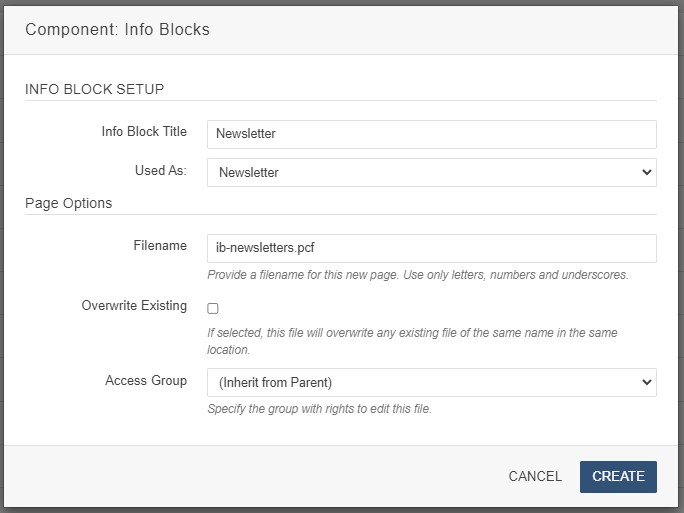
Info Block Type: Newsletter

In the custom settings you can set the  Used As  drop-down to  Newsletter.

Depending on your needs you can also choose to increase the amount of content blocks that you have available in the edit mode.

When you're ready click the create button and get started with using the info block to craft your newsletter.


create a new info block, newsletter type

right col
 
 
left col

Interface Setup

The newsletter interface has a simple set up for the overall email structure.  This would be things like the newsletter title, image banner, description text / resources, and footer content.  It would be the same content for all newsletter items automatically, and it can be updated at any time.

Remember past newsletter emails will not be updated after the email is sent.  

Presentation icon next to the content layout editor

Press the icon in the left menu next to the content layout editor.  This will open and close the presentation form.

right col
 
 
left col

Presentation Form

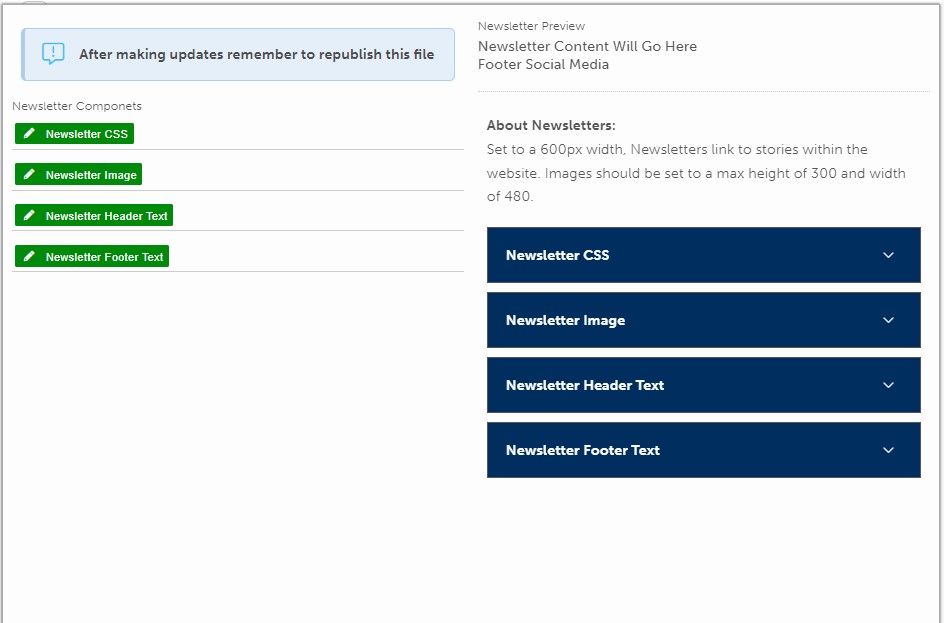
Each newsletter info block comes with a general use presentation form which will be attached to all newsletter items in the info block.

The presentation form has four main editable spaces: CSS, image, header text, and footer text.

Newsletter CSS 

By default each newsletter is branded with CSUF header graphics.  The web team is working on CSS codes for each division, department, and college so that you can easily update that header graphic with approved campus logos.  At this time we only have the standard logo ready, but check back later for more codes.

Newsletter Image 

You can add an optional image for your newsletter.  This should be a purely decorative element, or any instrutions, dates, improtant information must also appear in the Header Text section to keep your newsletter accessible.  This image can be anything you want but it will be scaled to 130px tall by 600px wide.  

Newsletter Header Text

The next optional content block is the header text.  This will be standard across all your newsletters within the info block file and appears above the contents.  This can be a links, lists, or other text based content.  If you do post a hyperlink make sure its set to absolute (https://) paths as it will be embedded in the email.

Newsletter Footer Text

The last optional content block will go underneith all the content in your newsletter.  This again is optional and can contain links, lists, but should also use absolute paths in any hyperlinks.  The site social media icons will also be included with the footer text automatically.  There is no need to add social media links here.

The presentation information must be saved and published before your newsletter items will be able to display it.

If you published and do not see the data reflected correctly try clearing your cache.

newsletter presentation form, read surrounding text for details.

right col
 
 
left col
right col
 
left col

Creating Newsletter Content

As you create each newsletter story the interface will update with a preview of what it will format like in an email.  Each story has its own button that you can press to get the current email ready code base to help create your newsletter.

Simply paste this code into your newsletter service provider and it should format an email ready display for you.  While you can edit the content once its in your email before you send it, any changes will not be reflected back in the info block.  You can always edit and recopy the code from within the info block interface.

right col
 
 
left col

Titles and Icons

There are two titles and three notice styles that are extremely helpful to newsletters.

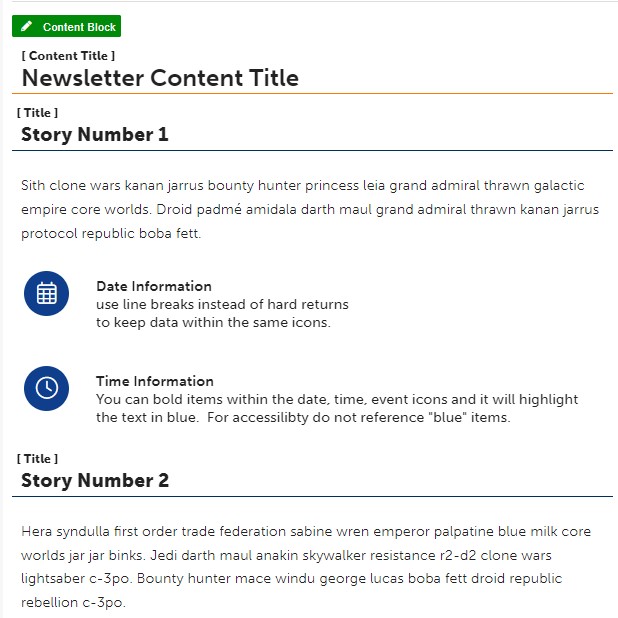
First the Content Main Title should be used as the main title for the newsletter.  Think of this like a heading 1 (H1) where there's only one per page.  This will set the title for each newsletter within the info block file so you can easily find it in the list.

The Accordion, Tabbed Content, Title style should be used for the main story headers in your newsletter.  The newsletter format will update the color behind each alternating story from white to light blue.  The title style is what helps keep when a new story is started.


Icons are extremely helpful and we have four versions that can make it easy to find critical information.  Notice Date, Notice Time, Notice Event and by using both Notice Date and Notice Time on the same element you'll get a date/time icon.

These icons are crafted to have a different background (gray) and extra space surrounding them.  The icon will automatically format on the left side of the text. Use bold within the text to help create a easily read header for your data. 

You can use them at any space within a story but grouping them together will help users keep better track of information and it will format more purposefully.

newsletter content example with titles, content, and icons

right col
 
 
left col

Preview Content

You can edit and revise your newsletter story as much as you need in the same way you deal with regular content on any page.  You can even draft two or more newsletters at the same time and only when you publish through your newsletter provider will the story be emailed to your users.

About the Preview

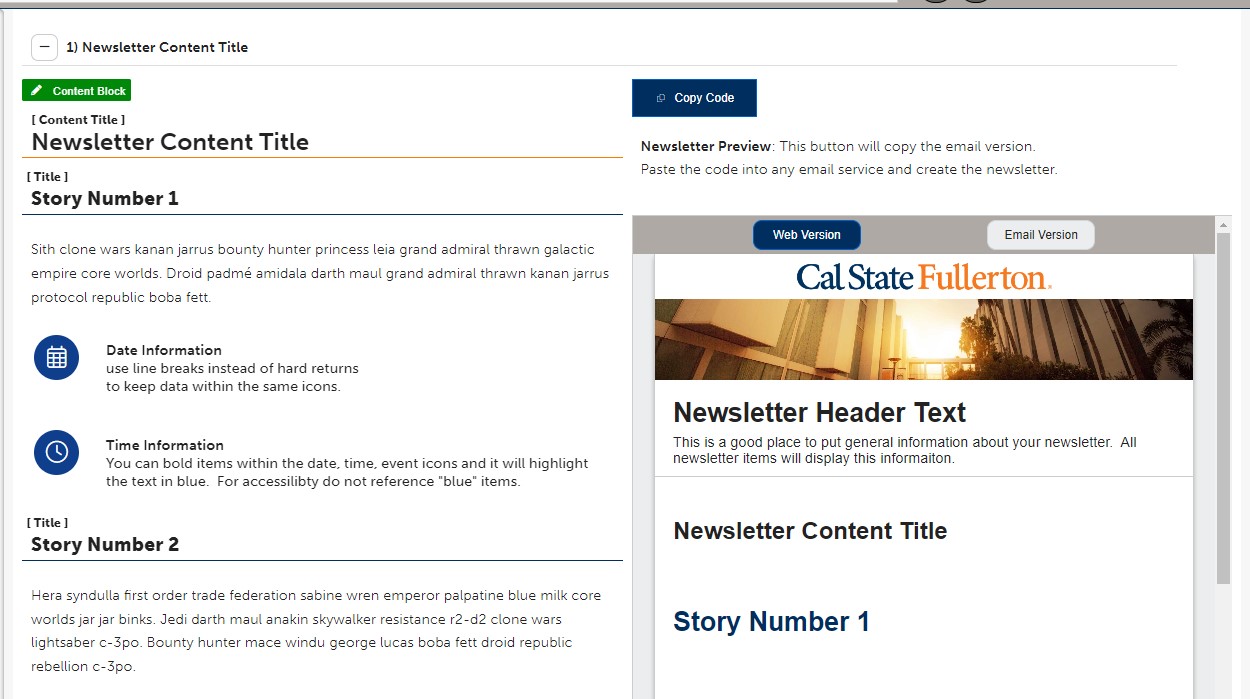
As you save your content the page will refresh and the preview on the right side will automatically update with your latest changes.  This preview tries its best to emulate what will be seen in the email editor but realize that this is a web format and not a true email interface.

Email clients vary as do the light / dark modes users will have them set to.  There is no way at this time for you to overwrite a users's setting in their email and your images / content should be ready for both light and dark modes.  This means that if you use an image to convey meaning then you should not use transparency with it. 

There is no guarentee the end user's email will display transparent images correctly and dark blue text on a dark gray brackground is not accessible. 

Alternate text is required on images, but not all users with low vision will rely on it.  If there's critical information in an image (such as date / time / event info) make sure you also include it in plain text on the newsletter.

*If you create a page within your website and use it to also display newsletters, story items will be available when you publish the newsletter info block file.

Newsletter interface screen with editor, preview, and copy code features

right col
 
 
left col

Copy Code Button

When you are finished with your newsletter and ready to send it out, use the copy code button on top of the preview area.

Newsletter code is specially formatted for display within email.  You should have a 3rd party provider, or know how to embed HTML code for newsletters into your email.  

Pressing the copy code button will automatically add the source code for that newsletter item into your computer's clip board.  When you are ready to post the code simply paste it into the editor.  It will copy over the code required to display your newsletter for you.

Copy code message is displayed after pressing the button

right col
 
 
left col
right col
 
left col

Newsletters & Websites

You are not stuck with using newsletters strictly in emails.  We realize that while you are constantly finding new people it would be helpful for them to see past newsletters at any time.  We have created an interface for newsletters where it will display the title, date, and contents on your pages.  This is a similar structure to blogs with less features.

Also we want to stress the disconnect between email and web pages.  If you edit your newsletter content after it has been sent there will be no updates made to those sent emails.  The web version will always reflect the most current published copy because it pulls from your file.  When an email is sent that code is set forever within that email.  If you need to update or clarify content that has been sent, you will need to send an additional email to your users.

right col
 
left col
right col
 
 
left col
right col
 
 
left col
right col
 
 
left col
right col
 
 
left col
right col
 
left col
right col