This page uses javascript to help render elements, if you have problems please enable javascript.
 
You are now inside the main content area
 
left col

Info Blocks

Image Galleries

Galleries have been updated to info blocks to provide more direct control over image placement and better stability.  Version control and true text editors will give you an easier time making content and adding images to your galleries.

right col
 
 
left col

Info block setup

When creating or changing an info block the type must be set as Image Gallery. 

You have up to 50 records per file but you can set the editor to be 1 - 10 up to 1 - 50 in sets of 10.

Image galleries are not dynamic content, there is no presentation interface to configure, all display options are done via styles.

page properties option for info block used as an image gallery

right col
 
left col

Galleries & Showcases

Starting in template version 5.24 image galleries are now able to become showcases.  This is similar to a regular gallery in that they are image driven but it now allows you the opportunity to turn them into sortable and filterable content pieces that link to other resources.  They do not open with additional information but you can use them to drive landing pages with menu options where users can filter the data into meaningful groups.

Layout presentation and snapshot options

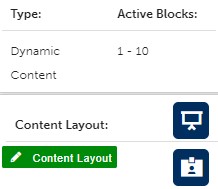
Presentation and Snapshot icons next to content layoutLocated next to the content layout editor you'll see two icons that are the presentation and the snapshot options.  These will open new spaces that allow you to configure the options for the layout and snapshot.

The presentation options where you can create a display using the Layout Builder or choose to set up the Gallery Options using a series of options that will build a layout for you.  Both the layout builder and the gallery options are similar to other info blocks presentation features we have in dynamic info blocks.  

Snapshots allow you to combine multiple files into one source and provides the user with a more refined choice before displaying all the data. It helps to minimize the amount of information thrown on the screen at the beginning.  This is an optional feature.

*Layouts are restricted by screen size, mobile and smaller displays will adjust to best fit the screen over the exact layout code.

right col
 
 
left col
right col
 
left col

Presentation Layout & Snapshots

Open the presentation layout using the icon next to the content layout editor.  It is above the snapshot icon and will open the presenation layout panel.  Gallery presentations fall into 2 options, a predesigned layout and a configured gallery or showcase.

The Layout Builder can support up to 50 items and is built using the same type of editor as regular content in info blocks and will put the items in the sections using the order in which things are edited.  

Gallery Options will provide you with options for Regular Galleries and Showcases.  The main difference being a regular gallery is just images and uses a light box mode when you click on an image.  The Showcase allows you to link to a resource and it will produce an item / card that links users to that place. The image is used to promote the item but text is also allowed depending on your showcase style.  Showcases also provide you with similar sorting, filtering, and fieldmaping that is used with other dynamic data like directories and applications.

Showcases will work with snapshots if you choose to combine multiple files.  You will need to use the Gallery Options and include additional information like the collection name to use them.  Snapshot data works here just like it does with dynamic data info blocks.

Saving layout options

When you are done with either the Layout Builder or the Gallery Options you need to copy the Content Layout from the options panel.  This content layout will automatically adjust as you make choices to your layout using the forms.  

Once you copy the layout you can close the options panel and use the Content Layout editor (left side of the editing screen) where you can replace any current layout data with the updated version.  Save the content here and the page will reload automatically with your new settings.  When you publish the gallery it will update public facing pages that use this data.

right col
 
 
left col

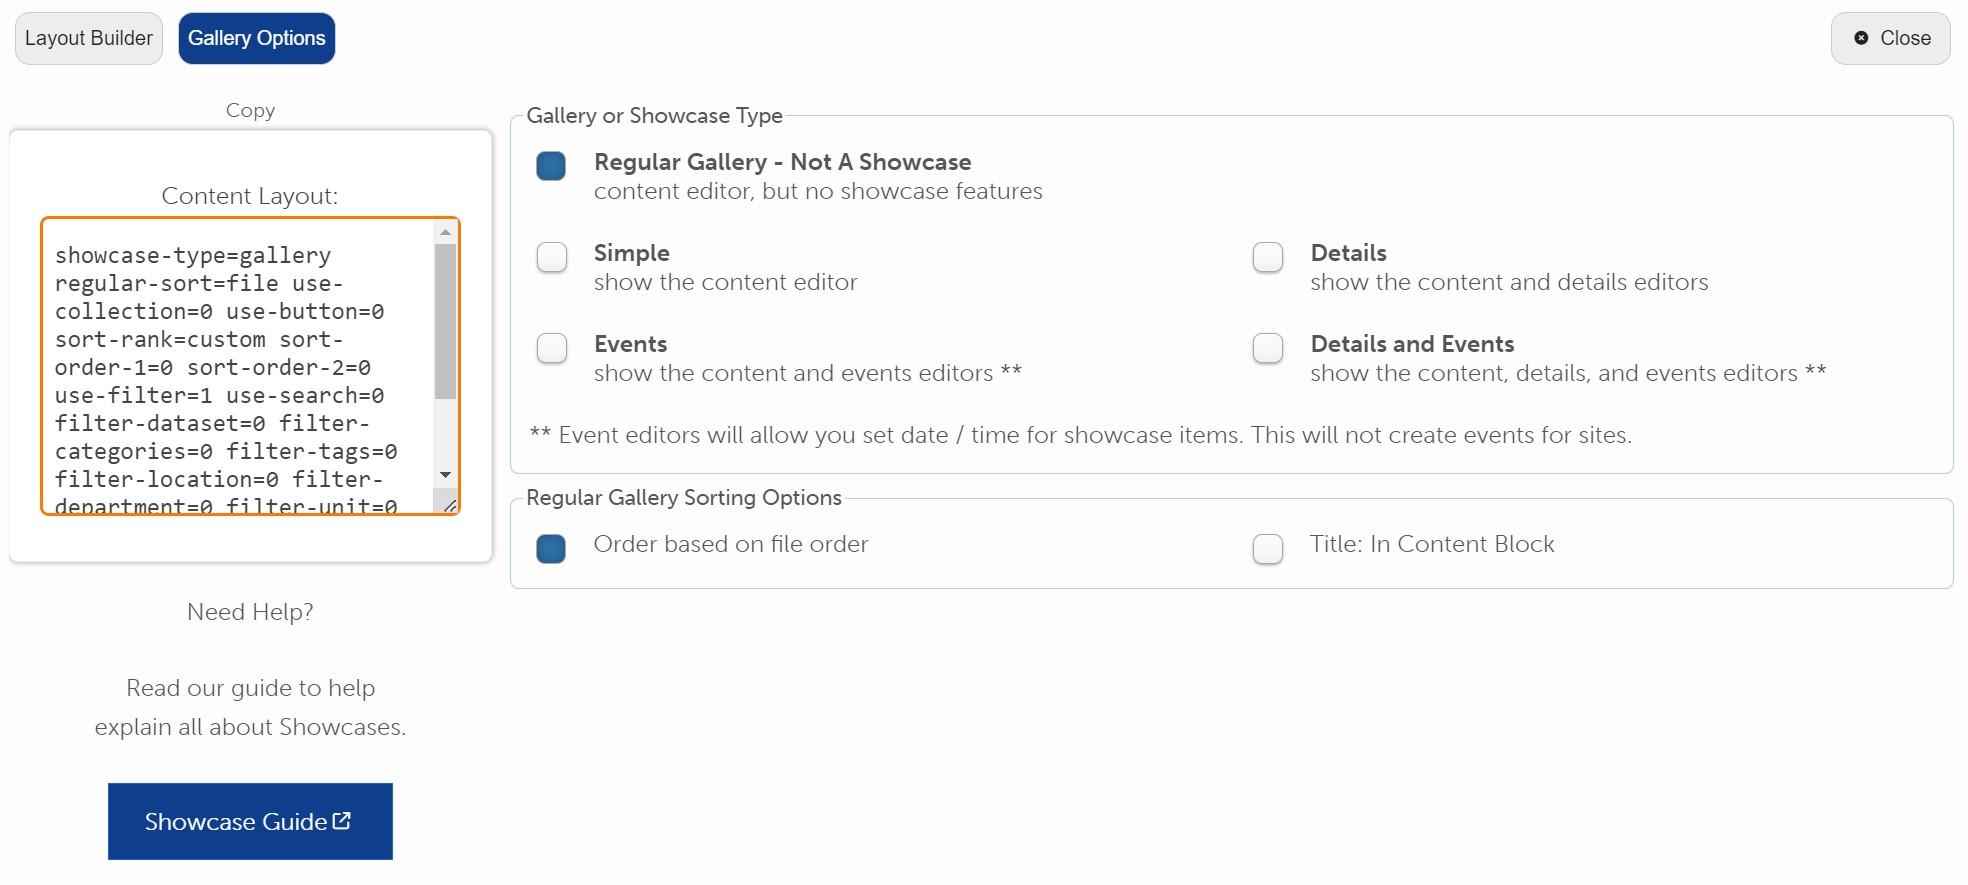
Regular Gallery (Not A Showcase)

regular gallery options

The first option for you in the gallery or showcase type is a Regular Gallery.  This type of gallery will have a lightbox feature that is automatically added to your pages.  The content that is typed into the content block is going to show up in the lightbox for most gallery style types.  

Sorting Options

Regular galleries will default to sorting based on the editor order 1 - 50.  If you need to have more control over your content you can choose to sort by the Title: in the content block.  This means you need to write some text and set it to the style Content Main Title.  That will help the sorting to A-Z sort your images.

If you use this make sure that the text makes sense.  Since content titles are shown in the light box it will display to the end user if they click on the image.

Showcase Options

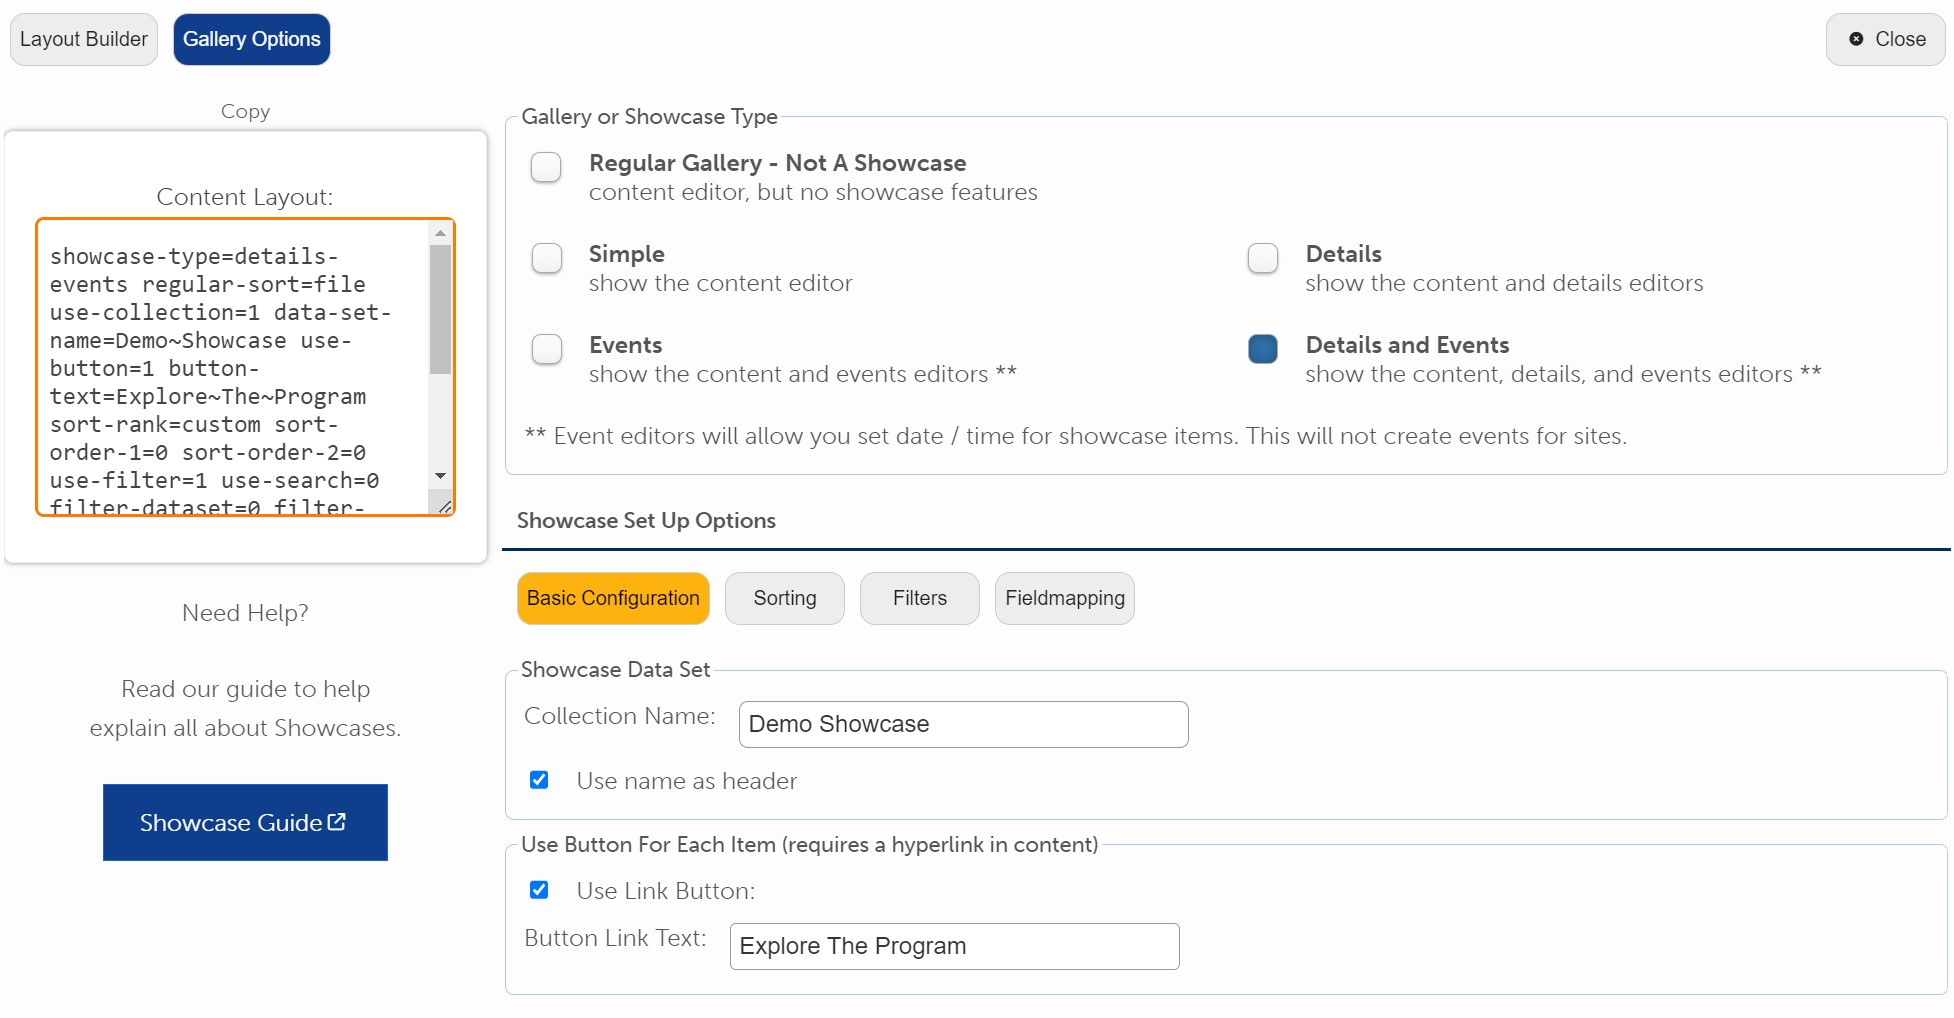
gallery options using showcase features

Choose any showcase type (Simple, Details, Events, or Details and Events) to open the showcase options. The options are orgnaized under the four main buttons to help reduce clutter on the page.  You will not lose data by going between each button.

Basic Configuration

The two options here are for the Collection Name and using a Link Button.

The collection name helps to group your showcase under a standard group name.  This can be whatever you want and when you have multiple files that use the same collection name the end user will only see one group.

The link button feature will replace the hyperlink for the content main title and uses a button with standardized text to help unify your showcase presentation.  If you choose to use a link button the default text will be "View Resource" otherwise you can use the input and overwrite that text to use the same phrase for all items.

Sorting

Showcases can use all of the items in the details editor, additionally they can also use the time start from the events editor.  This allows you to sort the showcase in multiple ways.  There are two levels of sorting and both of them are optional.

Filters

You can choose to turn them off within the options, or you can set which filters are displayed to the end user.  This allows for checkboxes that will help users refine what items they see.  This is optional and filters will only display when data is presented.

Showcases will auto disable filter options when something is selected at a higher level that negates the filter from matching any showing items.  Users can uncheck those filter items to enable them but this should keep users from missing filter choices but also not getting messages that no results were found.

Fieldmapping

If you choose to use a style like "position" from the details you can relabel it using fieldmapping to whatever you want.  Be aware that the first instance of a fieldmapped style will set it for all instances within the showcase.  If you have a showcase where the fieldmap is set from another file the first instance wins.


right col
 
left col

Content Editors

The main content for the image gallery comes from the Content Block section.  Put the image and the content you want to use in this space.  It does not matter the order but if you want to use sorting make sure that there is a title using the Content Main Title style on it.

Regular galleries can sort by either the order in which items are put on the file (section 1 - 50) or by using the content main title.

Showcase Editors

If the gallery is going to be used like a showcase then you have 4 choices for editors.  They allow you to start with very few and grow to meet your needs.  You will always have the CSS option and depending on the choise you will get editors to meet your needs.  You can change the editor type without losing data, but if you go from a more complex to a more limited the ability to see the editor data will be hidden. 

Showcase editor configurations:

  • Simple
    • Includes the category and tag editors
  • Details
    • Includes the category, tag, and details editors
  • Events
    • Includes the category, tag, and events editors
  • Detail and Events
    • Includes the category, tag, events, and details editors

Creating gallery items with event data will not be seen as a true event, it is only used for data sorting by time.

right col
 
 
left col

Editing Gallery Data

By default the gallery will format into a three column (or less) format for easier management of content within the info block file.  This should help minimize the scrolling that is done to manage most galleries.

You can choose different ways to sort data so you're not locked into the order which they are edited.

Content Block Editor

The basic editor is just showing the Content Block section.  That is the section for images and any additional content you want to put with it.  On most gallery styles this extra content will be displayed when the gallery is in light box mode.

Showcase styles, which do not use a light box mode, will display the image and text on the same area.  Depending on the showcase style, you may see only the content main title or more data in the order which it is entered.

Each content block will always display the CSS editor so you can apply filters to image gallery items.

Additional Editors

The showcase options will provide you with Category and Tag edtiors for each type of showcase.  Sorting options require that details editor data be used so make sure your showcase editor style includes the fields you need to edit.

Regular gallery editing layout in three columns

gallery editor three column view

Simple Showcase with the categories and tags editors

editor display using simple showcase layout

As you choose different options for the editor you see different editors appear.  The Details and Events Showcase editor has the most options available where the editors are separated into two columns

editor configuration using details and events showcase

right col
 
left col

Image Content / Metadata

What's the difference between content and metadata?  Content is basic text that is very user friendly, written as you would write something like this sentance.  Metadata is specific fields for helping describe an item.  In the case of an image it might be a title, date created, author or phographer, even a brief description.

Metadata is useful when formatting is the goal since we know what data goes with which field.  Check with the style sheet for the image galleries to see which style uses metadata and how they use it.  The default style relies more on the content block data since its easier and more free form; however, if you are trying to emulate a true exhibit space with the gallery you will probably want something like the museum style that helps create standard labels for each piece.

right col
 
 
left col

The Details Editor

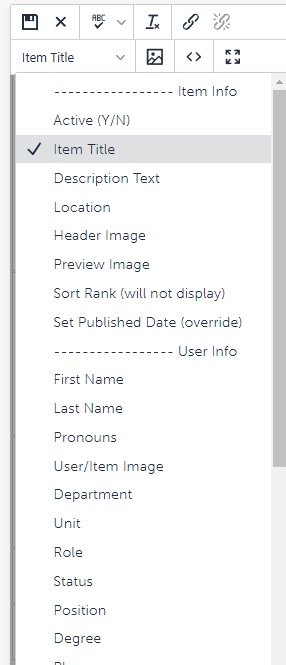
While in the editor you can use the style dropdown menu to choose the field you want to give a value for.  Select the field and type your value.  The field name will automatically appear above the data that is typed.

If you press return within the editor it will retain the last used style.  You can use the style dropdown and look for check marks next to any used styles. 

Verify that the correct style(s) have been used and uncheck the ones that no longer apply. Each time you uncheck the style menu will close and you need to reopen it - this is an Campu CMS behavior.

To make it easier on yourself after you have your first detail section completed and saved, we recommend to copy that field for the next one.  Each field will already have its style set and you can just change the data.

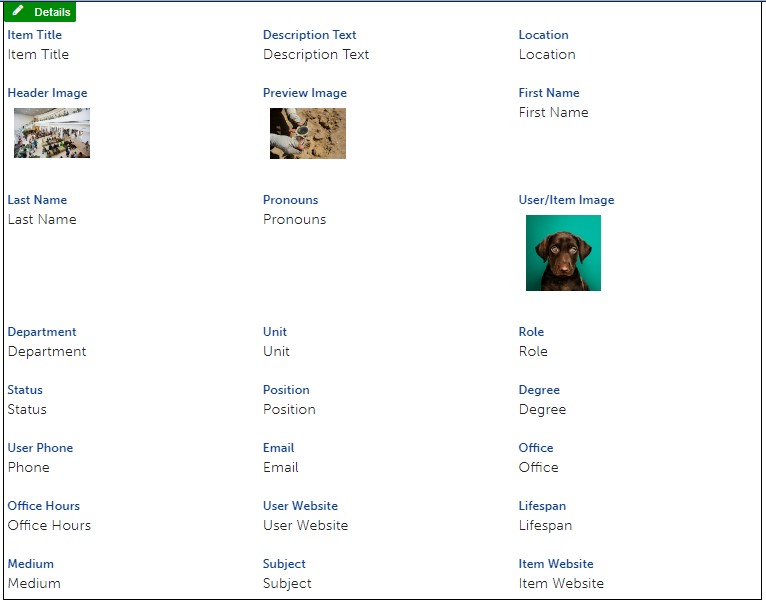
There is no field mapping available in image galleries and not all fields are used.  Check the gallery styles for more information on what fields are used and how they will be displayed.

directory details options with all fields and data displayed

right col
 
left col
right col
 
 
left col

Detail Styles (Field Names)

The Detail editing toolbar has a list of available fields for use.  Not all fields are used so be sure to check your style guide for clarification.  If an item needs to have the same field used multiple times it is better to use a separate instance of it rather than do a comma separated entry, but the choice is yours.

Item Info
  • Active (Y/N) - this allows us to hide items without deleting them
  • Item Title - provide context as to what is the item name
  • Description Text - depending on the interface this may show up in the default display or show on the larger full item view
  • Location - where the item is found, office building, relevant place
  • Header Image - an image which will either show up in the full view, or across the top of the info block.  Style will have a direct impact on where / when this displays
  • Preview image - mostly used for blogs, this will show up in full view on some interfaces alongside the description text
  • Sort Rank - usually a value like a number or letter, this is used for sorting based on editor choice and not something like a name.  Useful if you have a specific order that needs to be maintained - also be aware this values is manually updated
  • Set Published Date - the info block will track the original published date of each item.  If old content needs to be backdated or changed this will allow editors to overwrite with a new date
User Info
  • First Name - first name of user or item
  • Last Name - last name of user or item
  • Pronouns - provides space to indicate user chosen pronouns (he/she/they) 
  • User/Item Image - image that is used by default for directory items
  • Department - most relevant department name
  • Unit - if user/item is within a department in a section or other area that is important
  • Role - could be speicifc duty, or function that is important to this item
  • Status - provides current information about item
  • Position - user hired as, or item placement / usage 
  • Degree - on a directory this will be placed after user firstname lastname with a comma
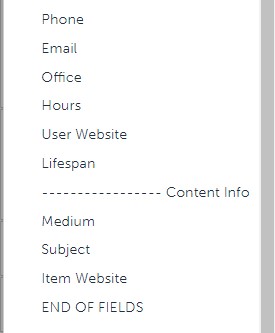
  • Phone - phone number where they can be contacted
  • Email - email address as text, or as a mailto link
  • Office - office number, building, etc
  • Hours - plain text version of office hours
  • User Website - plain text url, or hyperlink to website *do not use URL as hyperlink text
  • Lifespan - meant to be used for image galleries when looking at artist information, multiple entries may be allowed based on display style
Content Info
  • Medium - Describe materials, multiple entries may be allowed based on display style
  • Subject - item subject matter, multiple entries may be allowed based on display style
  • Item Website - plain text url, or hyperlink to website *do not use URL as hyperlink text


detail styles dropdown menu showing an example of the list of styles

second half of the details style dropdown values

right col
 
left col

Publish the gallery

When you're ready to put the gallery on a page you need to save your work and publish the file.  The gallery can be added to any section on a page and will display below the content of that section.  

Be aware that if you move the gallery page it may break the image sources and require editing each image to fix it.  It is better to create your info block gallery file in a standard location, then put it where you want.  We suggest using the _shared folder in your site root. That way you do not have to move your info block around if you restructure your website.

right col
 
 
left col
right col
 
left col
right col
 
 
left col
right col
 
left col
right col
 
 
left col
right col